Lucas Cross Farm
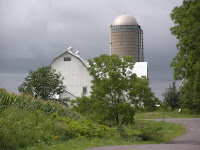
I took these photos nearly 10 years ago and I have wanted to paint these barn buildings since then. I think it will be a good demonstration of the planning and execution from a photo to a painting. I'm attracted to the simple palette and the contrast of the barn against the dark sky.
First, here are a few pictures of the original scene:
I will be using the center one as my basic design, with some changes of course.
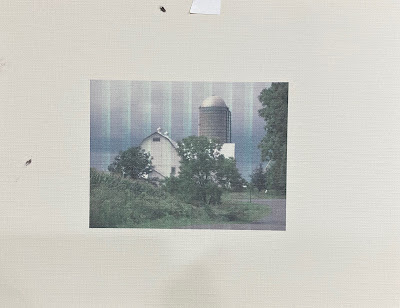
Step 1. PRINTING
I cut a piece of the Strathmore Canvas Paper to 8 1/2 x 11 and put it in my printer, with my fingers crossed that it wouldn't ruin the printer. It went through just fine, and this is the image. The paper didn't take the ink too well, but it saved me a lot of drawing.
Step 2. DECIDING ON A SIZE
I waffled for a while between 9x12 and 12x16, and finally decided on the former. So then with the proportion wheel, ruler, and white masking tape in hand, I decided where it needed cropping. Then I started to apply paint to the canvas paper print.
Step 3. ADJUSTING THE DESIGN
I asked myself what I didn't like about the painting...the major thing was the silo was too tall. So I shortened it, made the right hand tree more interesting, and developed the gray thing on the right into a house. I made the center tree larger.
Step 4. MORE DEVELOPMENTS
I tried some blue in the sky and made notes on the canvas. I plan to add a flight of geese and will call the painting "Heading South."
Step 5. THE GRIDDED CANVAS
I marked off the canvas with soft vine charcoal into one inch squares and numbered them accordingly.
Step 6. GRIDDING THE PRINT
I taped Saran Wrap over the print and used my ruler to divide the space into 9 equal sections vertically and 12 equal sections horizontally. Note my ruler is not in the corners. The actual size of the print was around 5 1/4" horizontally and I wanted to divide it into 12 parts. I angled the ruler until the 6" mark was on the right side of the print. I then put a tick mark every 1/2 inch. Then did the same vertically, and numbered the squares accordingly.
Step 7. THE CHARCOAL DRAWING
Following the grid on the print, I carefully drew in the basics of the composition.
Step 8. THE COLOR DRAWING
Carefully wiping out the charcoal as I went along, I painted where the charcoal lines had been. I used a darkish blue-gray.
Step 9. THE UGLY COLOR UNDERPAINTING
You can see I'm still undecided about the sky. I do want to keep it on the dark side so it will contrast with the white barn. The geese will go somewhere in the left side. That's a detail which I will paint last. I made one major change...rather than have the road make two turns (which confuses the eye), I eliminated the right hand turn which keeps the eye in the picture. The eye then goes back to the tree and up into the rest of the painting.